CALL US TODAY- +91 80 25422021

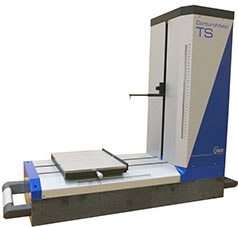
ConturoMatic TS – Contour Measuring Device
Contour measurement – beyond the classic methods: the connection of the X- and Z-measurement axis in a feed unit inevitably leads to narrow limits. Our solution: the separation of X and Z. The benefit: both axes are regulated in such a way that the speed to the contour remains constant regardless of the course of the contour gradient. Classic feed units can only run with a constant X-speed, which can lead to greater distances between the measuring points with steep contour sections. The integrated Y-table, which takes over the dynamic feed of parts at the same time, is an additional benefit of the range. Our probe arm is virtually always horizontal. The probe tip can flexibly follow the entire measurement range of 250 x 320 mm. As the position of the probe tip can always be precisely defined to the fraction of a millimetre repeatedly, it is always possible to make reliable and automated measurements even in the smallest holes (1.5 mm). In addition, our system automatically compensates for guidance deviations in the Z-axis, which often result in measurement errors due to the lever action of the probe arm length.

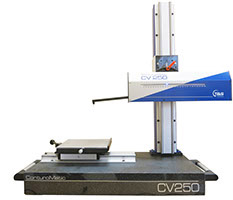
CV120 and CV 250 – Initial Steps into Contour Measurement
Focusing on the essentials. ConturoMatic CV systems are classic contour measuring devices with intelligent functions and clever automation. They offer everything that a high-performance and reliable contour measurement system needs to provide. Workpieces can be measured automatically over the course of the entire measurement range. The calibration of the complete feed unit is fully automated as a reference programme. The high precision, detailed evaluation, simple operation and outstanding price (e.g. CV120 from € 13,950) make ConturoMatic CV systems extremely attractive.

ConturoMatic Evaluation Software
A feel for what matters. The needs of users have always been right at the top of our list of requirements. This has been our guiding principle from the outset: contour measurement must be quick and easy. The skill is to combine the simple and intuitive operation of the systems with systems with unlimited levels of performance. The operating concept of our evaluation software is ideally suited for monitoring production and also for using in measurement laboratories. All evaluation functions can be accessed by the click of a mouse without laborious menu bars and sub-functions. One simple measurement includes everything that you need to generate an automatic test procedure including an evaluation. Teach-in in its purest form. It goes without saying that we provide our customers with free software updates and enhancements for the lifetime of the device. A further advantage is that we require no special hardware. All the system peripherals are "standard" and therefore easy to replace. This saves lots of time and money if the worst comes to the worst.